Organizing Your Monolithic Rust Projects with Cargo Workspaces
Organizing Your Monolithic Rust Projects with Cargo Workspaces
cargo comes with a lot of flexibility when organizing your projects in Rust, but we all know flexibility can sometimes prevent someone from making progress because there's so much you can do that you don't know which one you should start with.
Through this article, I hope to give you a much more opinionated and clear way of organizing your Rust projects.
Let's get started!
Creating the Workspace
To create a workspace, start by making an empty directory with the command below.
mkdir my-rust-workspaceYou might be wondering...
Why not cargo new?
Your goal is to create a workspace with a virtual manifest which I'll discuss in the next section.
For now, go into your newly created directory below and create a Cargo.toml manually.
cd my-rust-workspace
touch Cargo.toml
Open Cargo.toml in your favorite text editor and add the following lines
[workspace]
members = []
This is a table in TOML, specifically, the workspace table and you'll be using this to configure your workspace in the next sections.
What's a virtual manifest?
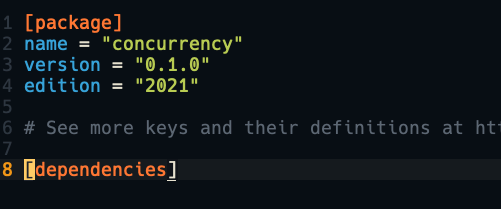
A virtual manifest is a directory with a Cargo.toml file that does not contain a package table commonly denoted with [package].
Here's an example Cargo.toml with a [package] table.
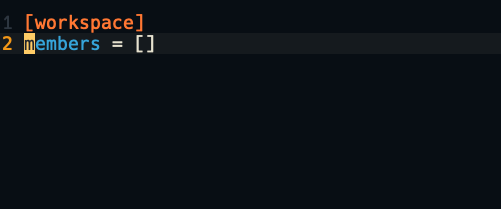
Here's a virtual manifest for your workspace my-rust-workspace.
Adding libraries and binaries with cargo new
While in your my-rust-workspace directory you can add libraries (lib.rs types) and binaries (main.rs) types by using cargo new my-lib --lib and cargo new my-bin respectively.
Let's create 1 binary and 1 library with the following commands below.
cargo new app
cargo new applib --lib
If you did it right you should end up with the following Cargo.toml
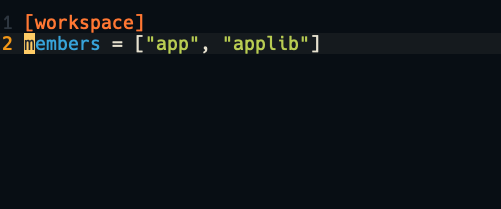
cargo new automatically adds your binaries and libraries as members of your workspace!
Awesome, right?
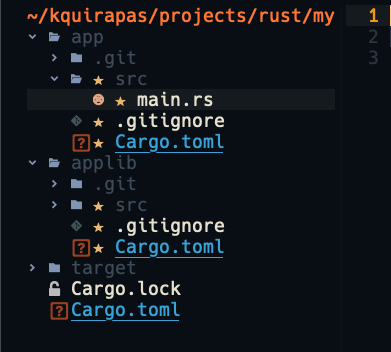
Your workspace should now look similar to the image below.
Unexpected warning?
If you're following along you might experience this warning when adding your libraries and binaries.

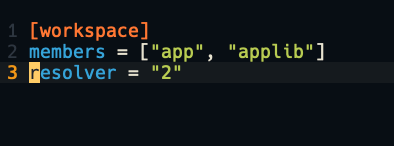
cargo workspaceCargo's feature resolver is a topic for another day, but for now, suppress the warnings by explicitly adding resolver = "2" in your virtual manifest.
Testing your new workspace
Let's test your new workspace by using cargo run.
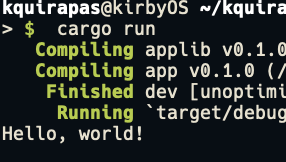
You can see that it's saying Hello, world! but where is it coming from?
By default, cargo run looks for a main.rs file to run in your workspace.
In this case, it's in your app/ package.

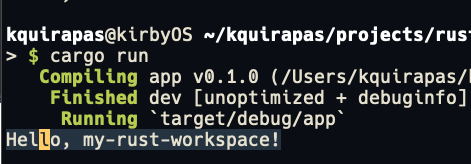
Let's test this out by changing the code to Hello, my-rust-workspace.

Run your code in your package with cargo run
Using the library
In order to use the applib/ library package in your workspace for your app/ binary package use the command below.
# cargo add <DEPENDENCY> --package <TARGET>
cargo add applib --package app
You must now be able to see applib library package added as a dependency in your app binary package.

Let's test it out!
First, create a hello() function in your
applib library lib.rs file.

Import this function in your app binary package by adding the line below in your main.rs file.

Finally, invoke the hello function in the main function and run your program with cargo run.


That's it! You can now use your workspace as you see fit!
What if I have multiple binaries?
Add one more binary package to your workspace with cargo new app2.

Try running your app in your my-rust-workspace with cargo run again.

You will receive this error.
> $ cargo run

error: `cargo run` could not determine which binary to run. Use the `--bin` option to specify a binary, or the `default-run` manifest key.
available binaries: app, app2
Just follow the error code and use the --bin flag to determine which of your binaries you want to run.

Done with your workspace?
I love Rust projects and I love them even more with Cargo Workspaces.
There's a different feel to having all your packages neatly placed in a satisfying monolith.
If you want more of this, subscribe to my newsletter!


![[SHORTS] Speed of Iteration > Brand](/content/images/size/w600/2024/05/soi.png)